
Adding and removing files
Watch on YouTube here.
Now that you’ve setup your profile, you’re ready to start adding files! FeatureFinder can handle many different file layouts, but they must meet the following requirements:
- Data files must be in text format, with a “.txt” extension;
- Columns are separated by a space, tab, comma, or semicolon;
- All files have the same number of header lines and the same number of channels;
- All rows of data must be formatted in the same way (e.g., same number of columns, no blank lines).
You can add files in two ways: one-by-one or all-at-once. The “all-at-once” approach is great—and almost necessary—for huge data sets. It’s accomplished using the “SMARTfill” tool (you’ll read about this in the next section). That said, you may want to occasionally do some “one-by-one” file management, e.g., to make minor changes to a bigger file list. This section explains how to do that.
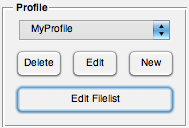
- In order to add or remove files in your profile, edit file parameters, or change channel settings, you’ll use the “File Management” tool. Open it by pressing the Edit Filelist button in the “Profile” panel.
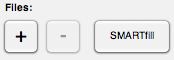
- At first, your file list will be empty. To add a file, select the [+] button under the “Files” heading. (Download sample data here, if you want to follow along.)
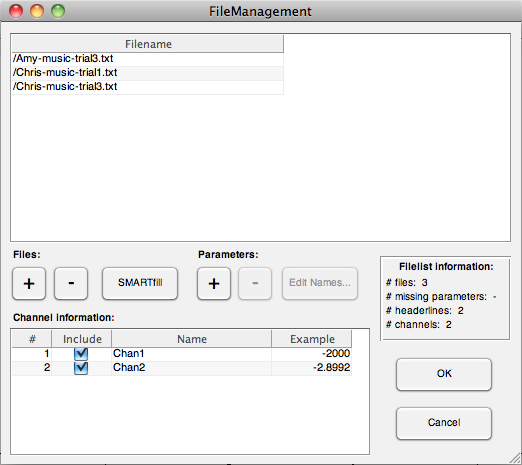
- You will be prompted to select one or more files. To select multiple files, use the CTRL button on a Windows machine or the Command button on a Mac. Click Open and the file(s) will be added to your file list. For example, let’s say that we’ve added three files:
- Note the “Filelist information” panel on the right side of the window. Among other things, we’re shown the number of header lines in our data files (i.e., the lines of text before the data starts) and the number of channels (i.e., the columns of data). These must be the same for all files. If that’s not the case, you’ll see an “X” in these fields.
- To remove a file from the list, simply select the file from the file list and press the [–] button under the “Files” heading. Use the CTRL (Windows) or Command (Mac) button to select multiple files from the file list.
TIP: It is possible to resize or maximize the “File Management” window. In this way, you’ll be able to see more of long filenames.
Adding, removing, and editing parameters
Each file is uniquely identified by a set of parameters. For example, the first file in the example above has the parameters [Amy, music, Trial1], the second has [Chris, music, Trial1], and the third has [Chris, music, Trial3]. The main things to understand about parameters are:
- no two files can share the same combination of parameter values, and
- all parameters must be defined for every file.
If you use the “SMARTfill” tool, you normally won’t need to give this much thought, but you will need to know how to work with parameters to add files one-by-one. Here’s how:
- Following from the example above, we’ve already added three files. We can see that no parameters have been added because there are no parameter columns in the file list (and we’d get an error if we pressed OK).
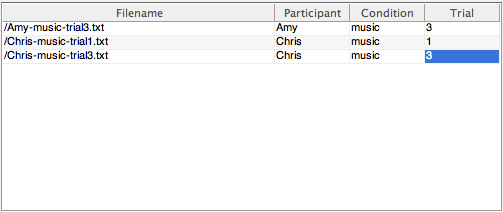
- The first thing we need to do is add parameters, and we can see from the file names that there are three: participant, experimental condition (music/silence), and trial. Using the [+] button under the “Parameters” heading, we can add three parameters.
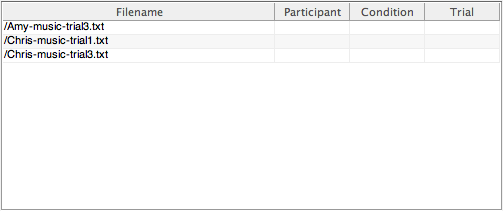
- The parameter names can then be edited to replace the default values (i.e., Par1, Par2, Par3) with something a little more meaningful. Use the Edit Names… button under the “Parameters” heading to do this. The filelist should now look like this:
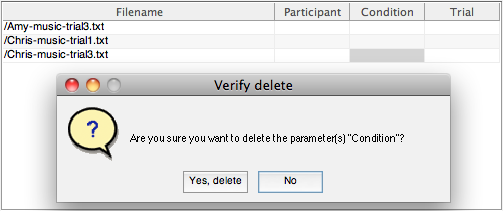
- To remove a parameter, simply select any cell in that parameter’s column and press the [–] button under the “Parameters” heading. You will be asked for confirmation before the parameter is removed from the table:
- Next, we enter the parameter values. Click on a cell to enter its value. As we enter each parameter value, we see the “# missing parameters” count decrease in the “Filelist information” panel. Remember: each file must have a unique set of parameter values, and values must be entered for every cell.
That’s it for parameter setup!
| << Setting up a profile | Using the “SMARTfill” tool >> |