
Consistent filenames
Watch on YouTube here.
The “SMARTfill” tool plays a very important role in FeatureFinder. As long as your data files are named consistently, this tool will let you pull all of them into FeatureFinder in moments—whether there are dozens or thousands. What does it mean to name files consistently? Here is an example:
- Sub1Trial04.txt
- Sub7Trial03.txt
- Sub10Trial01.txt
In this example, each file follows a simple pattern: the word “Sub” followed by the subject number, and then the word “Trial” followed by the trial number, and finally, the file extension.
Now, here’s an example of a set of files that isn’t named consistently:
- Sub04T5.txt
- Trial05-Subject1.txt
- S01TR05(this_was_monday).txt
In this set, the different filenames don’t follow the same pattern: sometimes the subject number comes before the trial number, and other times it comes afterwards, and the words used to indicate subject and trial are different in each case (e.g., Sub, Subject, S). Including experiment notes in the filename, as in the last example, causes greater inconsistency.
Instructions
Once you’ve created your profile, you’ll want to add data files to it. (You can get some sample data here.) Clicking Edit Filelist from the main FeatureFinder window will bring up the “File Management” window. From there, you can get use the “SMARTfill” tool to load a large number of data files into your profile in moments. Here’s how:
- Once your files are consistently named, you can begin by pressing the SMARTfill button in the “File Management” window.
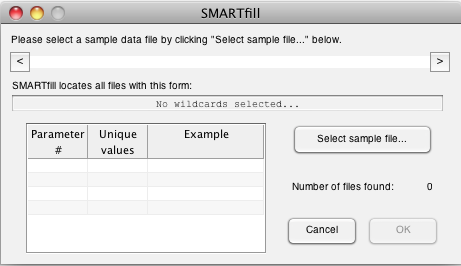
- Then click Select sample file… and choose any one of your data files. Remember: in order for SMARTfill to find all of your data files, they must be named consistently!
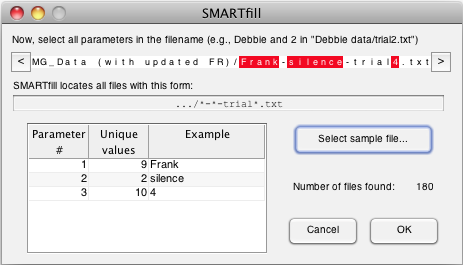
- You will now need to select the parameters of your sample file, like the study participant or trial number. You do this by clicking each of the parameters to highlight them. For example, you’d highlight the participant name, condition, and trial number in the sample file shown below.
- Note that the parameters are separated from one another—in this case by “-” and “-trial”. This is important, because otherwise the program won’t know where the first parameter ends and the second begins!
- To more clearly demonstrate what “SMARTfill” is doing, the search pattern used to find your files is shown below the sample file (the *’s are wildcards).
- The table beneath the search pattern will show you how many parameters you have selected, the unique values associated with each of these (e.g., there are nine different participants in the example above), and an example from your data set of the selected parameter.
- Take note of the “Number of files found” field. This should match the number of files in your data set.
- You can now click “OK” to send all the discovered files to the “File Management” window!
Channel settings
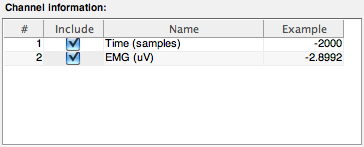
Once you’ve begun loading your file list, you’ll see the “Channel information” table fill up with, well, channel information:
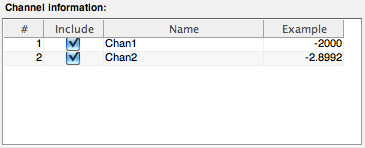
The table has four columns:
- # – This is the channel number.
- Include – The “Include” checkboxes allow you to control whether or not each channel is included in your profile.
- Name – The channel name, which can be edited from within the table.
- Example – An example of a data point drawn from the channel.
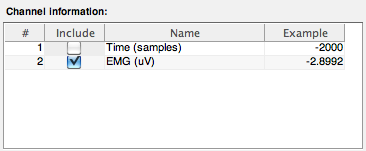
There are two settings you can change for each channel: the channel name, and whether it’s included in your profile.
- Channel names can be edited within the table—just select the current name, delete it, and then type in a new name.
- All channels are included in the profile by default. This can be changed using the checkboxes in the “Include” column. For example, we likely aren’t interested in extracting features from the time column, so we can uncheck its “Include” box.
| << Using the "File Management" tool | View and export your data >> |